Old Metal, New Fish

While targeting Lake Trout on the Wachuset Reservoir last season, I winched up an old 1 oz Kastmaster.  With some simple tools and materials, I made this old metal new again so that it can catch fish anew.

Fish360 Kastmaster DIY

I removed all the old hardware. I painted half of the metal with a blue Sharpie and sealed the color with a layer of Loon fluorescing hard head epoxy. And then I dressed the metal with a custom tied siwash tail hook.

Fish360 Kastmaster Loon Outdoors Sharpie

Kastmaters cast far and catch fish. But. They also last a long time! Give your weather, tide, current, and fish beaten Kastmasters new life using this simple technique.

Facebooktwitterlinkedin

DIY Jig Bag

Modern plug bags have an attached pouch with slots for thin profile metals and small bucktails.  This is a great option.  But!  If you are fishing 4, 5, and 6 oz bucktails or 4 and 5 oz Kastmaters, Deadly DicksHopkins, and Crippled Herring, then you need another storage solution.

DIY Jig Bag

All you need to make your own jig bag is a plug bag and 1.5″ diameter SDR PVC pipe.  Using a power miter saw with a stopper, cut enough PVC pipe lengths from the PVC pipe to fill your plug bag.  I cut 4.5″ lengths for bucktails and 8″ lengths for metals.

Fish360 DIY Jig Create

Remove the plug tubes from your plug bag and replace them with the 1.5″ diameter SDR PVC tubes.

DIY Jig Bag

I have re-purposed my two 3-tube plug bags into a bucktail bag and a metals bag.  I am always packed and ready to go, regardless of where and when I fish.  Time is fish!

Facebooktwitterlinkedin

DIY Clippings Basket

Tying custom flies, teasers, and bucktails gives you a competitive advantage. But, it’s a messy process. Clippings go everywhere. But! With a paper plate and a utility knife, you can make an inexpensive clippings basket.

Fish360 DIY Clippings Basket

First remove the arm from the pedestal. Second, press the paper plate on the arm mount on the pedestal to mark the diameter of mount. Third, cut out the hole with a utility knife. And lastly, mount the plate and then the arm.

Fish360 DIY Clippings Basket

There are commercial clippings baskets on the market. But, I have found this DIY basket so effective, that I have not even considered buying one. 😉

Facebooktwitterlinkedin

DIY Knife Sheath

I have a knife on my surf belt. But, when I am chunking, I like to keep my bait knife in my cooler next to my bait. Time is fish! A naked knife in your cooler will cause punctures. But! With some simple tools and inexpensive materials, you can make a bait knife sheath.

Fish3

Materials

  • 1″ PVC Pipe
  • Two 1″ PVC Cap Fittings
  • PVC Primer
  • PVC Glue
  • 60 Grit Sand Paper
  • 120 Grit Sand Paper
  • 1/8″ Bungie Cord

Tools

  • Safety Glass
  • Power Drill
  • 1/8″ Drill Bit
  • Plastic Gloves
  • Miter Saw
  • Tape Measure
  • Fine Point Permanent Marker
  • Utility Knife

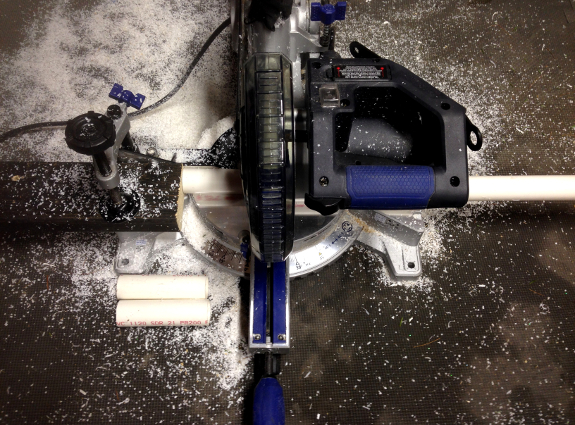
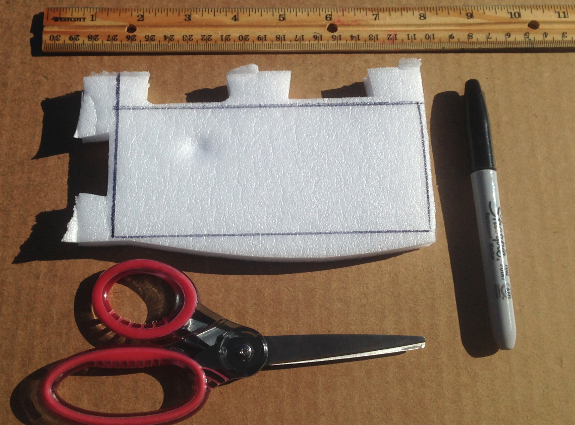
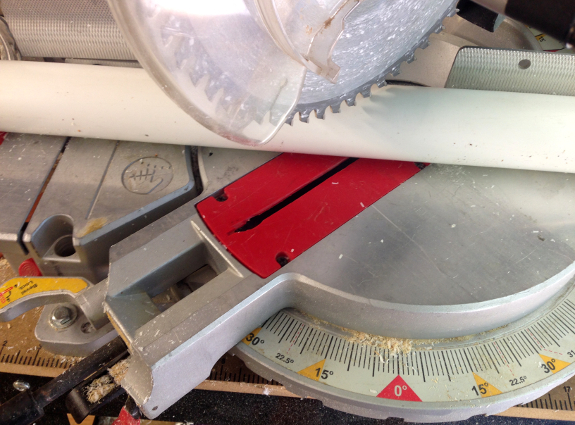
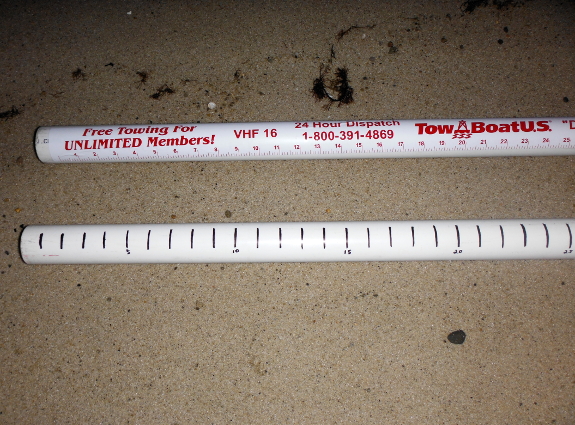
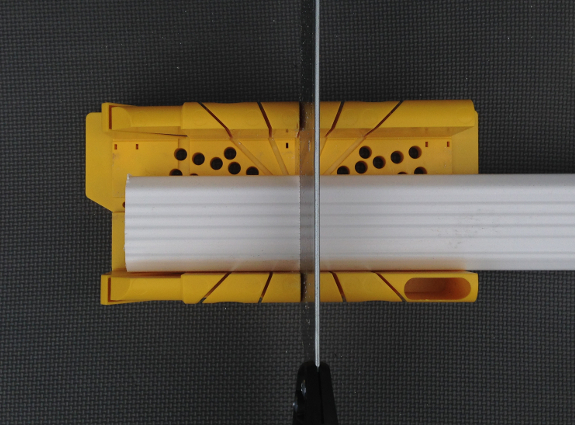
Measure and cut the PVC pipe to the length of your knife.

Fish360 DIY Knife Sheath

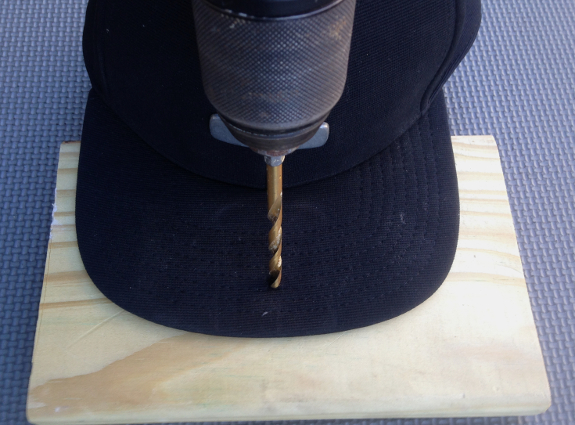
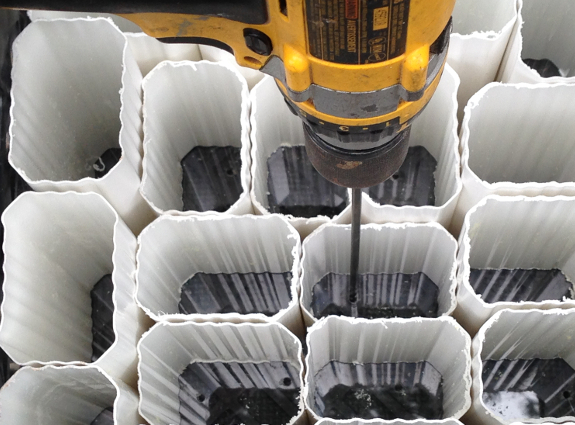
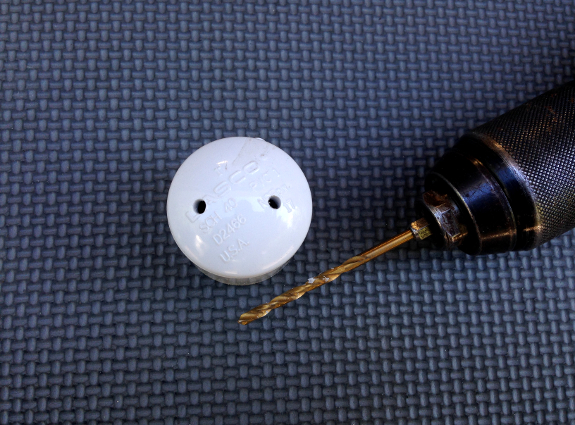
Drill two holes into the top of each PCV end cap.

Fish360 DIY Knife Sheath

Prime one end of the cut PVC pipe. Glue a PVC cap to this end.

Fish360 DIY Knife Sheath

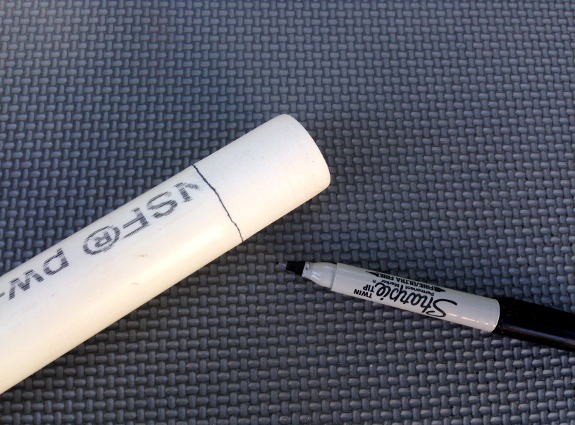
Draw a line around the other end to mark a 1″ section.

Fish360 DIY Knife Sheath

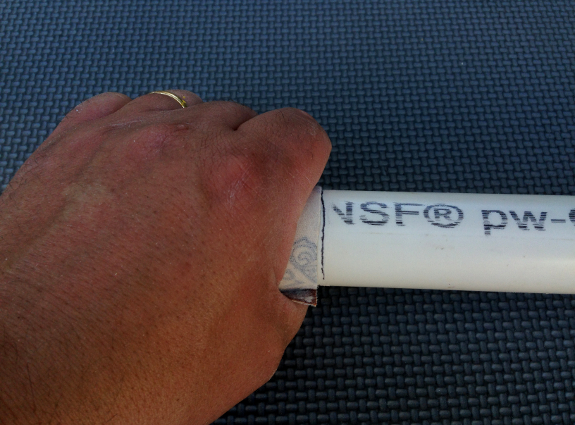
Using a 1″ wide strip of 60 grit sand paper, grind down the marked 1″ section of the pipe until a cap goes on and off with ease. Then smoothed the marked section with 120 grit sand paper.

Fish360 DIY Knife Sheath

Pass one end of the bungee cord through one hole on the glued PVC cap. Tie two overhand knots to keep the cord from pulling free.

Fish360 DIY Knife Sheath

Pass the other end of the cord through the same hole in the other PVC cap such that it’s pulled onto the pipe. Tie two overhand knots to keep the cord from pulling free. Repeat for the other two holes on the PVC caps.

Fish360 DIY Knife Sheath

This simple knife sheath has several advantages. First, it’s 100% corrosion resistant. Second, it will work with a variety of knives. Third, it’s inexpensive. And most importantly, it will protect your cooler from punctures!

Facebooktwitterlinkedin

DIY Sub Spinner

I like spinner baits. I like the sonic and flash fish calling characteristics of these presentations. I also like soft swim baits because of their seductive swimming action. These fish catching characteristics need not be mutually exclusive. With some simple tools and materials, you can quickly create a sub spinner for soft plastic swim baits!

Fish360 Sub Spin

Materials

  • Owner Jig Hook (e.g. Saltwater XXX Jig Hook)
  • Wire
  • Blades
  • Split rings
  • Swivels

Tools

  • Safety glasses
  • Needle Nose Pliers
  • Splint ring pliers
  • Fly Vice
  • Thread
  • Epoxy

First, make the sub spin.  Cut a 3″ length of wire and make a 90 degree angle at mid-length using a pair of needle nose pliers. Secure a barrel swivel to one end of the wire by making a loop. Mount a blade to the swivel via split ring.

Fish360 DIY Sub Spin

Second, secure the L-shaped wire to the bottom of the hook via tread and epoxy.

Fish360 DIY Sub Spinner

Third, insert the hook into the soft plastic.

The advantage of building your own sub-spins is customizability. You can select the specific blade geometry and size for a specific application. You can also add weight to the shank of the hook to make your presentation swim at a specific depth.

Facebooktwitterlinkedin

DIY Jig Crate

Jigs (bucktails and metals) allow anglers to work the entire water column for a multitude of species in freshwater and saltwater. Their versatility is virtually un-matched. Fishing them is easy. Storing them is not so easy. Hence, my inspiration to develop a jig crate.

Fish360 DIY Jig Create

Making your own jig crate is easy. The only materials you need are 1.5″ diameter SDR PVC pipe and a milk crate. The tools you need are a miter saw, a tape measure, and a pair of safety glasses.

The first step is to cut the jig tubes. The length of the jig tubes depends on the type of jigs you want to store. I use 4.5″ lengths for my bucktail jigs and 6″ and 8″ lengths for my metal jigs. A milk create will store 49 1.5″ diameter jig tubes evenly. That’s 49 cuts! I use a piece of 2″ x 4″ stock as a guide/stop so that I cut the jig tubes at the respective length and save time measuring.

Fish360 DIY Jig Create

Once all the jig tubes are cut, insert them into the milk create. You can use a 11.5″ long piece of plexiglas to sub-divide and organize the jigs, like you would sub-divide a Plano box. I like to separate my surf bucktails from my canal buck tails.

Alternatively, you can use a jig crate specifically for surf bucktails (1/2 oz to 4 oz) and thin profile jigs using 1″ diameter SDR PVC pipe. A milk create will store 81 1″ diameter tubes evenly! That’s 81 cuts!! Use a piece of 2″ x 4″ stock as a guide/stop!!!

Fish360 DIY Jig Create
Building your own low-cost jig crate gives you a versatile storage solution. You can organize you jigs by size, color, type, or application. You can also stack your jig crates to minimize their foot print. Your jigs are versatile. Your jig storage should also be versatile! 😉

Facebooktwitterlinkedin

DIY Fly Box

I target fish via fly in freshwater and saltwater. In calm and in gear-breaking conditions. I cast small and BIG flies. Hence, I created my own fly box.

Fish360 DIY Fly Box

Making your own fly box is easy. All you need is:

  1. Plano water-proof box without any internal dividers
  2. Styrofoam (recycled or from a craft store like Michael’s)
  3. Ruler
  4. Permanent Marker
  5. Scissors

Measure the interior width and length of the Plano box. Mark the styrofoam with the measured width and length via permanent marker. Using the scissors, cut the styrofoam outside the lines. Insert the styrofoam rectangle inside the box and trim as required. The styrofoam needs to be slightly wider and longer than the interior of the Plano box so that it pushes against the sides and thus does not fall out when you open the box.  For additional security, use super glue or epoxy to permanently mount the styrofoam to the bottom of the Plano box.

Fish360 DIY Fly Box

This inexpensive fly box is feature rich. It can hold more flies than I can fish in a single trip or tide. The internal volume allows for flies with big hooks. The hard outer shell can take abuse from extreme conditions. The rubber gasket and three latches keep my flies dry. Now that’s fishconomic!

Facebooktwitterlinkedin

DIY GoPro Head Mount

I bought a GoPro head strap mount a few years ago. It works. But, it always left a temporary imprint on my forehead. After many fishing trips, the stitching on the straps started to come undone. This inspired me to build my own GoPro head mount.

Fish360 DIY GoPro Hat

Materials

  • Fitted Hat with a stiff visitor
  • GoPro Head Strap Mount (minus the straps)
  • 1″ 8-32 Stainless Steel Bolt
  • Two 1/4″ x 1″ Stainless Steel Fender Washers
  • One 8-32 Stainless Steel Nylon Insert Lock Nut

Tools

  • Safety Glasses
  • Permanent Marker
  • Power Drill
  • 15/64″ Drill Bit
  • Screw Driver
  • Adjustable Wrench

Place the GoPro head strap mount on the center of the hat’s lid such that it just touches the edge. Mark the hole with the permanent marker. Remove the GoPro head strap mount and drill a hole on the mark with a 15/64″ bit and power drill.

Fish360 DIY GoPro Hat

Secure the GoPro head strap mount to the lit using the stainless steel bolt, washers, and nut. Tighten the setup using a screw driver and an adjustable wrench. Do not over torque!

Fish360 DIY GoPro Hat

My new GoPro head mount works surprisingly well. No imprints on my forehead. Just great video and shots! 😉

Facebooktwitterlinkedin

DIY Sand Spike

Chunking the surf for large predatory fish is the oldest and most widely exploited method by surfcasters. A sand spike, if used properly, is an effective tool. To use a sand spike properly, you need a proper sand spike. The fancy PVC sand spikes in your local bait and tackle shops with a flanged top and aluminum stud at mid-spike are for tourists!

Fish360 DIY Sand Spike

All you need to make your own custom sand spikes is a saw and a 10 foot length of 1 1/4″ PVC pipe. Cut the PVC pipe in half at 45 degree angle. You now have two sand spikes.  Really!

Fish360 DIY Sand Spike

What about the aluminum stud at mid-spike? You do not need one! The reason why the commercial sand spikes have the stud is because your rod but would hit the sand otherwise. The commercial stand spike also have much thinner walls and crack if you drive them into the sand with a piece of drift wood.  Using a rubber mallet, drive your sand spike into the sand 12 – 18 inches and insert your rod into it. Your reel will stop the rod from sliding all the way down.

A 5 foot long sand spike has two advantages.  The first is better leverage: the entire rod but pushes against the sand spike.  The second is height: your line is kept above the breaking waves during high surf conditions.

Fish360 DIY Sand Spike

The only other function my rod holders perform is measuring fish. I use a rule sticker works great.  Marking your sand spike at 1′ intervals with a sharpie also works well. I am not a fan of adding cup holders to my sand spikes.

When you are chunking the surf via sand spike, reel in your bait every 15 minutes. Why? Scavengers! Skates, crabs, lobsters, and other bottom crawlers will eat your bait and politely leave your hook bare. Bare hooks do not catch fish!

Facebooktwitterlinkedin

DIY Plug Crate


I hunt saltwater fish with plugs. I hunt freshwater fish with plugs. I hence have more plugs than my wife has shoes. However, to my wife’s delight, I have my own storage solution. I use custom plug crates.

DIY Plug Crate

To build your own custom plug crate, you only need some simple tools and inexpensive materials.

Tools

  • Miter Jig and Handsaw
  • Power Drill
  • 1/8″ x 12″ Drill Bit

Materials

  • Milk Crate
  • 10′ PVC Gutter Drain Tube
  • 11 3/4″ x 11 3/4″ plexiglass (0.80″ thick)

The first step in building your custom plug crate is to cut a total of 20 lengths from the PVC gutter drain tube. The best tool for this is a simple miter jig and handsaw; a power miter saw will chip the PVC gutter drain tube. If you have plugs of various lengths and you want to maximize a 10′ length of PVC gutter drain tube, then cut the following lengths:

  • Three 8″ lengths
  • Five 7″ lengths
  • Five 6″ lengths
  • Six 5″ lengths

DIY Plug Crate

The second step is to prepare the bottom panel of the plug crate. Insert the 11 3/4″ x 11 3/4″ plexiglass into the milk create to cover the bottom. (Be sure to have the piece cut to size for you!). Insert the 20 square tubes into the milk create and arrange them to maximize the space. Using a 12″ long 1/8″ thick drill bit and power drill, drill two holes into the plexiglass for each square tube. This will prevent the tail hooks of your plugs from snagging the bottom of the milk crate and provide drainage.

DIY Plug Crate

This low cost and easy to build plug storage solution has several advantages. First, scale-ability: you can stack up to 4 plug crates on a 12″ x 12″ foot print. That’s a log of plugs! Second, portability: you can easily transport your plugs to and from your truck, boat, or kayak. And lastly, low maintenance: after a day on the water, put the plugs into the crate, wash them down with a hose, and let them dry until the next trip. That was easy! 😉

Facebooktwitterlinkedin