Shad Flutter Spoons

The first time I went fishing for American Shad, I brought a Plano box with shad darts.  My friend was fishing next to me.  He caught fish.  I got shunked.  He was using shad flutter spoons.  Since that first trip, I have fished shad darts and shad flutter spoons.  Shad flutter spoons have consistently outperformed shad darts.

Fish360 Shad Flutter Spoons

Shad flutter spoons are so light that in order to get them down in the water column, I peg a tungsten sinker Carolina style.  I use 1/2 oz, 3/8 oz, or 1/4 oz depending on depth and current.  I prefer tungsten because of it’s high density and small foot print.

Fish360 Shad Flutter Spoons

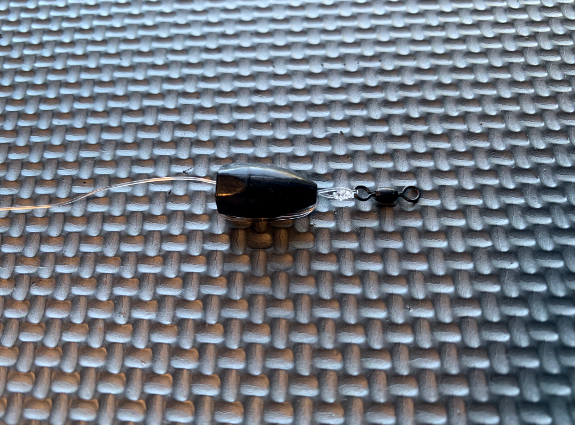
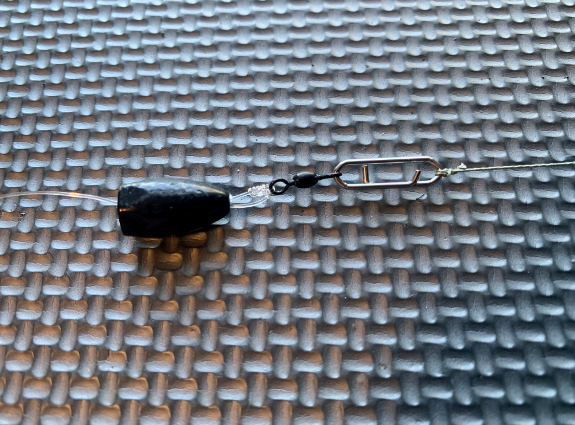
I make all of my rigs ahead of time and store them in individual ZipLock snack bags.  I then store these rigs in ZipLock quart bags based on size: 1/2 oz, 3/8 oz, and 1/4 oz.  I quickly change up my rigs by sliding the swivel off-and-on the Tactical Anglers clip tied to my main line.  Time is fish!

Fish360 Shad Flutter Spoons

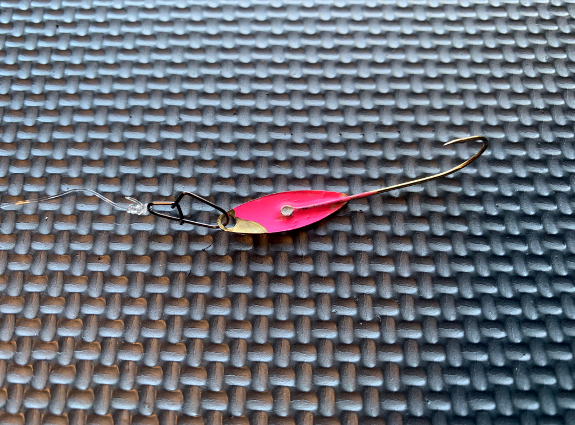
How a shad spoon is joined to your leader determines it’s action.  An improved clinch knot will make the spoon swim in a straight line during the retrieve.  I double surgeons loop knot will allow the spoon to flutter side-to-side.  I have found that a #2 Decoy Egg Snap provides the maximum flutter action because of it’s rigid radial arch.

Fish360 Shad Flutter Spoons

The two most popular shad flutter spoon color patterns are: yellow/gold and chartreuse/gold.  Ironically, I have had the most success with pink/gold!

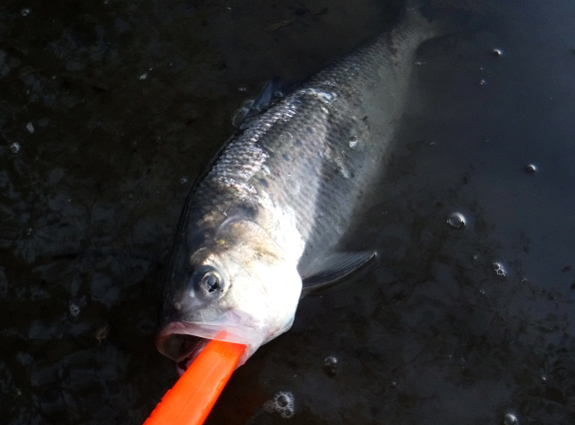
The next time you target American Shad, feed them spoons!  They cannot resist the seductive fluttering action!!

Facebooktwitterlinkedin

Bass Buff

Capt. Tom Mikolesk of Grand Slam Charters Montauk has been hunting fish full time for the past thirteen years.  In his book BASS BUFF A Striper Fishing Obsession Guide he shares his experience and expertise on targeting striped bass. In the first part of the book, Capt. Tom Mikolesk describes how he got hooked on striped bass and how he became a charter captain.  He also provides a historical and biological overview of striped bass.

Fish360 Bass Buff

In the second part of the book Capt. Tom Mikolesk shifts focus to techniques for targeting striped bass from a boat.  He explains in detail how to properly and safely troll umbrella rigs, bunker spoons, parachutes, tube and worm, and plugs.  He also describes how to drift eels and 3-way bucktails.  The value of this book is in the proven practical technique tips.  For example, how you rig a bunker determines if it will swim on top or towards the bottom.

Are you a surfcaster looking to fish from a boat?  If so, then this book is for you. Are you already targeting striped bass from a boat and would like to improve or expand your techniques?  If so, then this book is for you.  Are you looking for the latitude and longitude coordinates for the secretes spots to hook and land a 50 pound striped bass?  If so, then this book is not for you.

Facebooktwitterlinkedin

DIY Transducer Side Arm Jig

I have multiple kayaks. Each kayak has it’s application.  When I was selecting a fish finder, my primary requirement was mobility.  I needed a solution that that I could quickly move between kayaks: battery, unit, and transducer.  The most challenging part was the transducer.  I chose the Ram Mounts Transducer Arm.

Fish360 DIY Transducer Side Arm Jig

The Ram Mounts Transducer Arm comes with a straight aluminum rod.  You need to put a 90 degree bend at the right point on this rod.  Bending a 90 degree angle into the straight aluminum rod is easy, if you have a jig!  Download and print my jig template.  Cut out the template and trace it onto a scrap piece of wood (e.g. 1.5″ W x 3.5″ H x 3″ L).  Cut along the lines via band saw or jig saw.  (Wear eye protection!).  Drill a 0.5″ hole via power drill through the center of the jig.

Fish360 DIY Transducer Side Arm Jig

Secure the Ram Mounts 1″ ball and clamp to your kayak’s gear track.  Insert the aluminum rod into the clamp.  Pass the jig through the aluminum rod.  With a Sharpie, mark the aluminum rod at the end of the jig.  Remove the aluminum rod and jig from the clamp.

Fish360 DIY Transducer Side Arm Jig

Secure the jig to a work bench via clamp.  Adjust the aluminum rod until the Sharpie mark is aligned with the edge of the jig.  Gradually bend the aluminum rod.

Fish360 DIY Transducer Side Arm Jig

Mount a stock piece of wood on the other side of the rod.  Gradually bend the rod in the opposite direction to form a 90 degree angle.

Fish360 DIY Transducer Side Arm Jig

Attach the bent aluminum arm to the Ram Mounts clamp on your kayak’s gear track.  Insert the plastic sleeve onto the aluminum arm.  Secure the transducer housing to the end of the aluminum arm.

Fish360 DIY Transducer Side Arm Jig

The RAM Mounts Transducer Arm provides me with maximum mobility.  When I need maximum speed on the water, I rotate the arm until it’s parallel to the water.  Great product!  Perhaps some day it will come with it’s own jig to bend the aluminum rod.


Facebooktwitterlinkedin