DIY Spool Jig

The most efficient and economical way to spool your reels is by using a 1,500 yard spool. These large spools are challenging to handle. But, with some simple tools and inexpensive materials, you can build a spool jig.

Fish360 DIY Spool Jig

Materials

  • 5/8″ Diameter Wooden Rod
  • 2 1 1/2″ Finish Nails
  • 6 2 1/2″ Screws
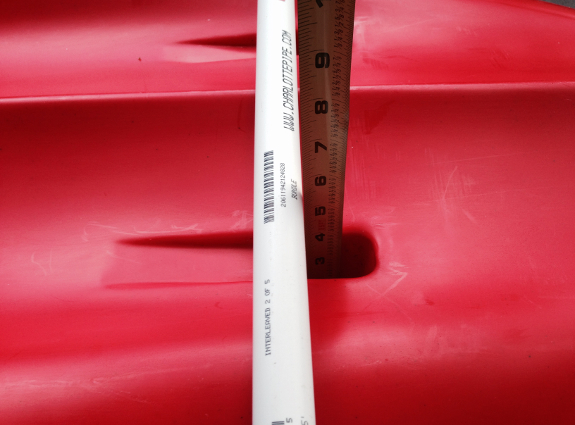
  • 1″ PVC Pipe (with a 5/8″ Inner Diameter)
  • 2′ 2″ x 8″ Stock
  • 2 5/8″ Rubber Hose Washers

Tools

  • Power Drill
  • 1/8″ Drill Bit
  • 5/8″ Spade Bit
  • Mitre Saw
  • Hammer

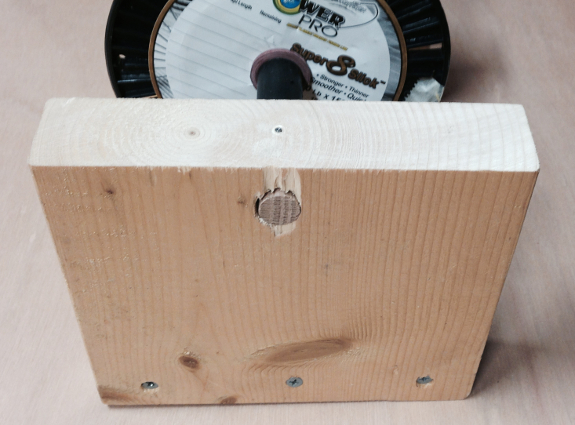
Cut a 7″ length from the 2″ x 8″ stock. This will be the base. Cut two 6″ lengths from 2″ x 8″ stock. These will be the sides. Measure and mark the center lines on one end of each side. Measure 1/2″ down from the top of each side’s center line and make a perpendicular mark. Drill a 5/8″ hole at each of these two cross marks. These holes will be for the 5/8″ wooden rod that the spool will rotate on.

Fish360 DIY Spool Jig Step 1

Standup the two sides against the base. Pass the 5/8″ wooden rod through the two holes until the end of the rod is flush with the far side. Mark and cut the rod to length.

Fish360 DIY Spool Jig Step 2

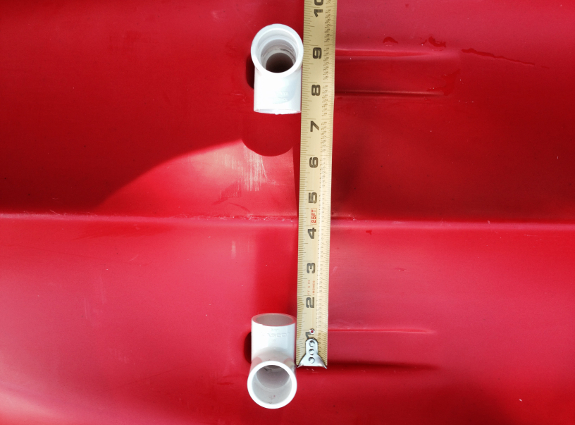
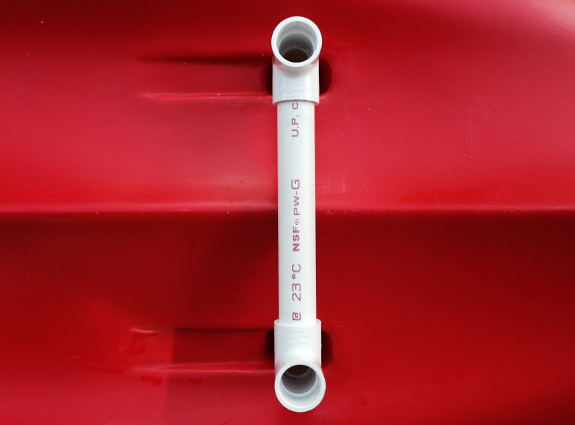
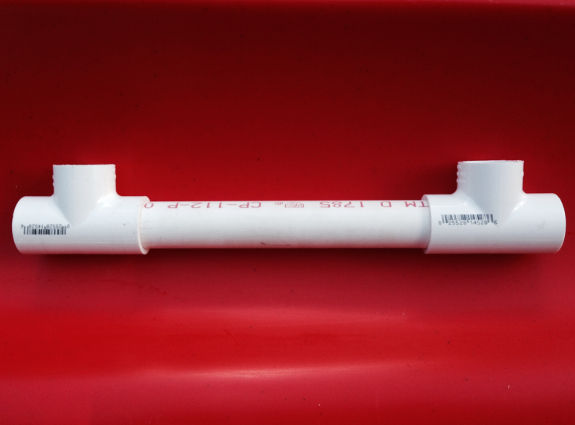
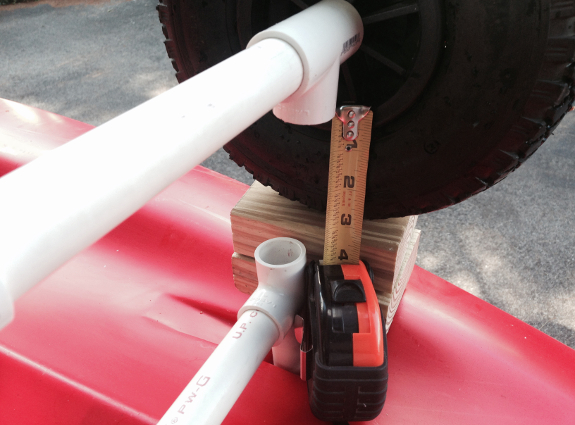
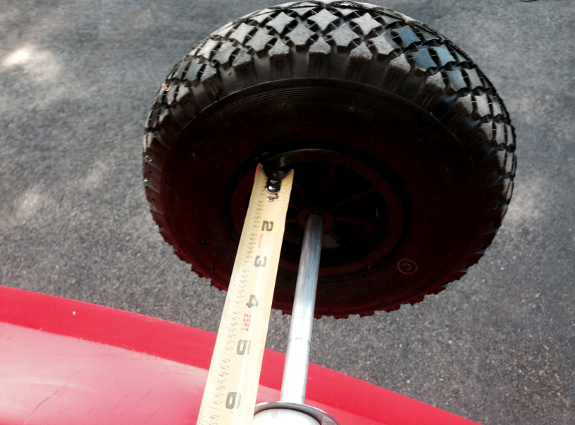
Center the spool onto the rod. Insert a 5/8″ rubber hose washer onto each end of rod until they are flush with the spool. Measure and cut two lengths from the 1″ PVC pipe such that they push against the rubber hose washers and the inner sides of the jig. To calculate this length, add the width of the spool and the thickness of the two rubber hose washers. Subtract this total length from the length between both sides and divide the result by two. Insert the two PVC lengths onto each end of the rod. These PVC segments will keep pressure on the washers as the spool rotates.

Fish360 DIY Spool Jig Step 3

Insert each side onto each end of the rod. Drill a 1/16″ hold through the center of the rod from the top of each side. Drive a 1 1/2″ finish nail though each hole. This will secure the rod to the sides and keep it from rotating.

Fish360 DIY Spool Jig Step 4

Secure the bottom to the sides using 2″ screws. Be sure to pre-drill using a 1/8″ drill bit.

Fish360 DIY Spool Jig Step 5

There are commercial line winders available. But, given the high performance of my low cost DIY spool jigs, I am not in a hurry to buy one. 😉

Facebooktwitterlinkedin

Surfcasting the open beaches of Plum Island and the North Shore

The Plum Island Surfcaters hosted Steve Gallant, from Plum Island Surf Guide Service, at their September club meeting. He presented Surfcasting the open beaches of Plum Island and the North Shore.

Fish360 Steve Gallant Plum Island Surfcasters

Steve Gallant fishes 100+ nights each season. His experience came through during his seminar when he covered topics like: Gear, Time of Year, Tides and Moons, Eels, Plugs, and Conversation. His tips on when and where to fish live eels versus rigged eels was worth the price of admission! 😉

Steve Gallant posts fishing reports on Surfland Bait and Tackle. His fishing reports are more like journal entries with tips on what is working and when. The fishy pictures and videos are easy on the eyes too! 🙂

Fish360 Steve Gallant striped bass

Steve Gallant is the hardest working surf guide on the North Shore of Massachusetts. If you are new to surfcasting or your are looking to take your game up a level, then attend one of his upcoming seminars! Or better yet, book a trip with him!! Trust me!!! 😉

Facebooktwitterlinkedin

Tackle Management: Box it!

I fish for all species using all methods. I thus exploit a variety of products and methods to manage my tackle. The Plano 2-3620-01 and the Plano 2-3600-01 boxes manage 80% of the saltwater and freshwater tackle that I fish.

Fish360 Plano Tackle Box

Out of the box, so to speak, the 2-3620-01 can accomadate 4 presentations up to 10.5″ in length. The 2-3600-01 can accomadate 6 presentations up to 7″ in length. Both of these models can be sub-divided in a multitude of ways to accomodate a variety of tackle.

Fish360 Plano Tackle Box

Keeping your tackle organized will help you get out on the water faster. Keeping your lures organized will allow you to select the right lure for the conditions and structure you are fishing in seconds, instead of minutes. Bottom line, the Plano 2-3620-01 and the Plano 2-3600-01 boxes are great tackle management solutions that will help you catch more fish at a cost that will not break the bank. Now that’s fishconomic!

Facebooktwitterlinkedin

Swim baits: Fish on!

When I presented my Freshwater Surfcasting seminar this past June at the Plum Island Surfcasters, I covered a cross section of the presentations for targeting freshwater species. But! I failed to cover swim baits! Frankly, I had not fished them much. Until now! 😉

Fish360 Chain Pickerel Gary Yamamoto Swim Bait

During my last trip to the Nashua River, I fished soft plastic swim baits in force. The first swim bait out of my Plano box was a Gary Yamamoto 5″ blue swim bait. I like the wide profile of this swim bait. I made on long cast up current along the shadowy river bank. Nothing! I made a second long cast. Fish on!! “OMG!! What did I hook?” Came to mind as I pulled in a lengthy 2 lb 1 oz chain pickerel.

I drifted with the current and continued to fish the shadowy shoreline. Nothing! I switched the color and profile of my presentation by switching to a Gary Yamamoto 5″ green pumpkin swim senko. My kayak got turned and was perpendicular with the current. Not an optimal postion to cast. Not wanting to lose my drift, I did a single handed side cast up current. I cranked the reel twice. Fish on! An aggressive large mouth bass hit the swim senko with a vengeance!

Fish360 Large mouth bass Gary Yamamoto Swim Senko

Swim baits is a large category of lures that encompasses wooden top water swimmers to deep swimming plastic swimmers with internal weights, and many baits in between. I really like the versatility and fish catching-ability of soft plastic swim baits. You can rig them weedless. You can weigh them to swim at the depth you need. I do a lot of surfcasting. So, making long casts up current and retrieving a swim bait just feels natural to me. I now carry a variety of swim baits in a Plano box that swim throughout the water column. I am still exploring these versatile lures. Stay tuned! 😉

Facebooktwitterlinkedin

DIY SOT Kayak Cart

Transporting a kayak from your vehicle to the water’s edge can be aggressively done by grabbing the handles at mid-boat and heaving the kayak up and over your head. But, then you have to come back for your gear. If parking for the access site is 1/4 mile away, then multiple trips back and forth is lost time fishing. With some inexpensive materials and basic tools you can easily build a proper kayak cart to transport your SOT kayak and gear safely and efficiently all at the same time.

Fish360 DIY SOT Kayak Cart

MATERIALS

  • 6 feet of of 3/4″ SCH 40 PVC Pipe
  • 4 3/4″ PVC T fittings
  • 2 wheels (e.g. 3.00 x 4 Wheel)
  • 1 24″ long x 1/2″ Diameter Aluminum Rod
  • 4 1/2″ x 2″ Stainless Steel Washers
  • 2 1/8″ x 1 1/4″ Cotter Pins
  • 8 oz of PVC Primer
  • 8 oz of PVC Cement

TOOLS

  • Power miter saw
  • Power Drill
  • 1/8″ Drill Bit
  • Channel Lock Plyers
  • Hack Saw
  • Tape Measure
  • Fine point permanent marker
  • Safety Glasses

Before you start cutting PVC, the fist thing to do is get your axle ready. Solid 1/2″ diameter aluminum rods are available at Home Depot and Lowes in 3 foot lengths. Using a hack saw, cut the 1/2″ diameter aluminum rod to 24″ inches. Measure 3/8″ from each end and drill a 1/8″ hole using a power drill.

Fish360 DIY SOT Kayak Cart

These holes will be for the cotter pins that will keep the wheels from rotating off the axle.

Fish360 DIY SOT Kayak Cart

The first measurement to determine is the length of the segments that will go through the scupper holes (i.e. “A”). Flip you kayak over so that the bottom is facing up. Place a segment of PVC across the hull just below the scupper holes that the cart will use. Measure the length from the top of the scupper hole to the top of the PVC pipe traversing the kayak. Add 3″ to this measurement. Cut two PVC segments at this length.

Fish360 DIY SOT Kayak Cart

The second measurement to determine is the length of the PVC cross members (i.e. “B”). Insert the two “A” segments into the tops of two T fittings. Insert these units into the scupper holes so that he middle holes of the T fittings are facing each other. Measure the distance between the two T fittings. Add 1 1/2″ to this measurement (3/4″ for each fitting). Cut two segments at this length.

Fish360 DIY SOT Kayak Cart

Insert one “B” segment into the center holes of the two T fittings with the “A” segments. This is the upper part of the cart.

Fish360 DIY SOT Kayak Cart

Insert one “B” segment into the ends of the other two T fittings. This is the lower part of the cart.

Fish360 DIY SOT Kayak Cart

The third measurement to determine is the length between the two segments that will join the upper and lower parts of the cart (i.e. “C”). Insert the upper unit into the two scupper holes. Insert the aluminum axle through the lower part of the cart and temporarily mount the wheels. Place this assembled lower unit above the scupper hole using 3″ spacers underneath each wheel. Measure the distance between the two T fittings. Add 1 1/2″ to this measurement (3/4″ for each fitting). Cut two segments at this length.

Fish360 DIY SOT Kayak Cart

Connect the the upper and lower parts of the cart via “C” segments. Insert the cart into the scupper holes.

The fourth measurement to determine is the length of the segment that will keep the wheels at the expected distance (i.e. “D”). The simplest way to calculate this measurement is to push the axle to one side. Measure the length of exposed axle. Divide this length by two and add 3/4″ to account for each respective T fitting. Cut two segments at this length.

Fish360 DIY SOT Kayak Cart

Remove the wheels and the axle. Insert the two “D” segments into the ends of the T fittings. Re-insert the axle and re-mount the wheels temporarily. Insert the cart into the scupper holes.

Triple check the assembled cart and make adjustments as needed. Break down the cart. Prime and glue all the connections.

Fish360 DIY SOT Kayak Cart

There are some some generic SOT kayak carts on the market. I am sure they work fine. But, I personally prefer to build a custom SOT kayak cart for 1/3 of the cost. Did I mention I have a fleet of kayaks? 😉

Facebooktwitterlinkedin